Photographing the Annapurna region
This image was taken at sunset whilst trekking in the Annapurna region of Nepal in November, 1995, using a Pentax SF7 35 mm SLR with a 28-80mm zoom lens and Kodak ISO 100 colour negative film. Aperture and shutter speed were not recorded, but given that the shot was taken handheld prior to the development of image stabilization technology, it was likely to be around F8 at 1/125 second.
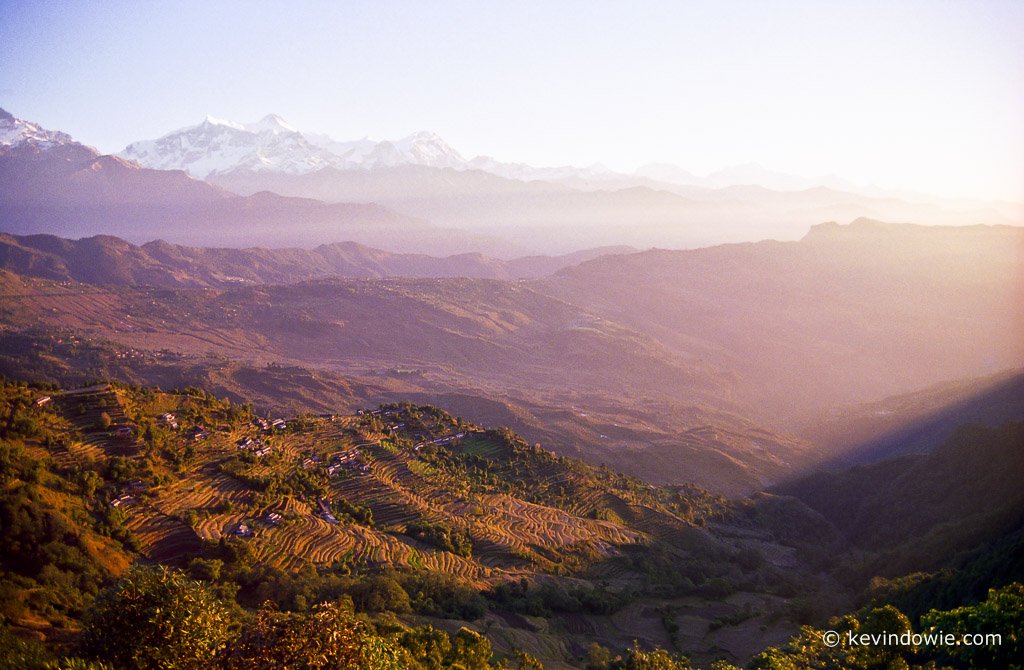 Sunset on the Annapurna Range, Nepal
The negative was scanned using the Epson V700 flatbed scanner and Epsonscan software and is presented here full-frame without digital enhancement. Whilst the subject matter itself was appealing, the lighting was (and often is) critical. With the sun low in the sky, the scene is strongly side-lit which has the effect of giving the features in the landscape some dimensionality. Also at the start and finish of the day the colour temperature is warmer, the light takes on a golden, even reddish, toning. That’s why so many people love sunsets!
Avoiding camera shake.
Ideally, with a scene such as this, no subject movement, an acceptably sharp image would require the use of either a support, such as a tripod with a cable release or self-timer or, if handheld, a shutter speed fast enough to overcome camera shake. Sometimes when travelling, carrying and using a decent tripod can be a hassle, so what are the considerations for handheld photography? The traditional rule of thumb is that to get acceptably sharp images handheld, the shutter speed used should be faster than the inverse of the lens focal length. So for example with a 50mm lens you would be using a shutter speed of 1/50 of a second or faster (in practice it would be 1/60 of a second or faster). This is a fairly rough guide and will vary from person to person depending on how steady you are and how careful you are with your technique. By concentrating on holding the camera firmly and pressing the shutter release slowly and smoothly, I found that I could often get acceptably sharp images 2 or even 3 stops slower than the rule of thumb would suggest.
Achieving Acceptable Sharpness.
Another consideration when talking about acceptable sharpness is how large are you going to print or display the image. The rule of thumb described above is a useful guide, in my view, if you’re printing to postcard-sized or maybe 10×8 inches (25x20cm). At larger sizes, small defects in the image become more apparent, and even slight camera shake becomes more obvious. With this particular image, I believe I can get an acceptable print quality to a size of 18×12 inches or maybe even 24×16 inches without any detail loss due to camera shake.
Image Stabilization in the digital age
At these sizes, the limiting factor becomes the appearance of obvious film grain. Image stabilization (IS) technology is a great development allowing extra leeway when taking handheld shots in falling light. IS, or “vibration reduction” (VR) if you’re a Nikon user (effectively the same thing), uses tiny motors within the barrel of the lens acting like gyroscopes. The result is that the lens will steady itself to the extent that handheld shots can be achieved several stops slower than without IS or VR employed. In more recent years we’ve seen the widespread adoption of In-Body Image Stabilization (IBIS) as well with some systems now claiming as much as 6 stops of total IS. We are now seeing, in some cases, the capability of producing useable handheld shots at moderate focal lengths with shutter speeds as low as 1/4 second! Extra-ordinary. ~KD.