Image compositing in Photoshop.
Following on from my previous blog entry…. which was…um…(insert sound of crickets)…. six weeks ago…. Today I finally get around to posting a more detailed look at the image processing steps involved in the “White Tern taking flight” picture. Make sure to read through to the end of the post as I’ve included some useful resources!
Introduction
Today’s digital photo processing software gives us some wonderful compositing capabilities. This has all sorts of possibilities for overlaying and montaging images in an imaginative way, but can also be used effectively for realistic natural history images as well. In this example, being mindful of the processing possibilities at the time of capture, and capturing additional frames, gives the photographer some useful options.
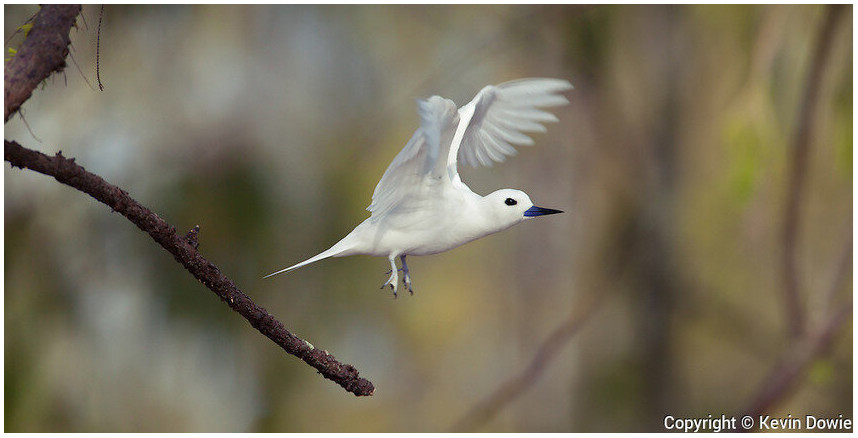
The final image, (shown above) a panoramic format shot of a white tern launching into flight from a small branch.
Shooting for a composite
I’d been watching and photographing this bird for a couple of minutes through the telephoto lens with a tele-extender attached so total focal length 700mm (500mm +1.4x extender). I had the shutter speed and aperture that I wanted and had acquired focus. As the bird leapt into flight I got a shot of it but, on reviewing the image on the camera’s LCD, I wasn’t happy with the composition.
Figure 1 (Below): the first frame, the bird nicely in focus, but a bit too close to the right edge of the frame for my liking.
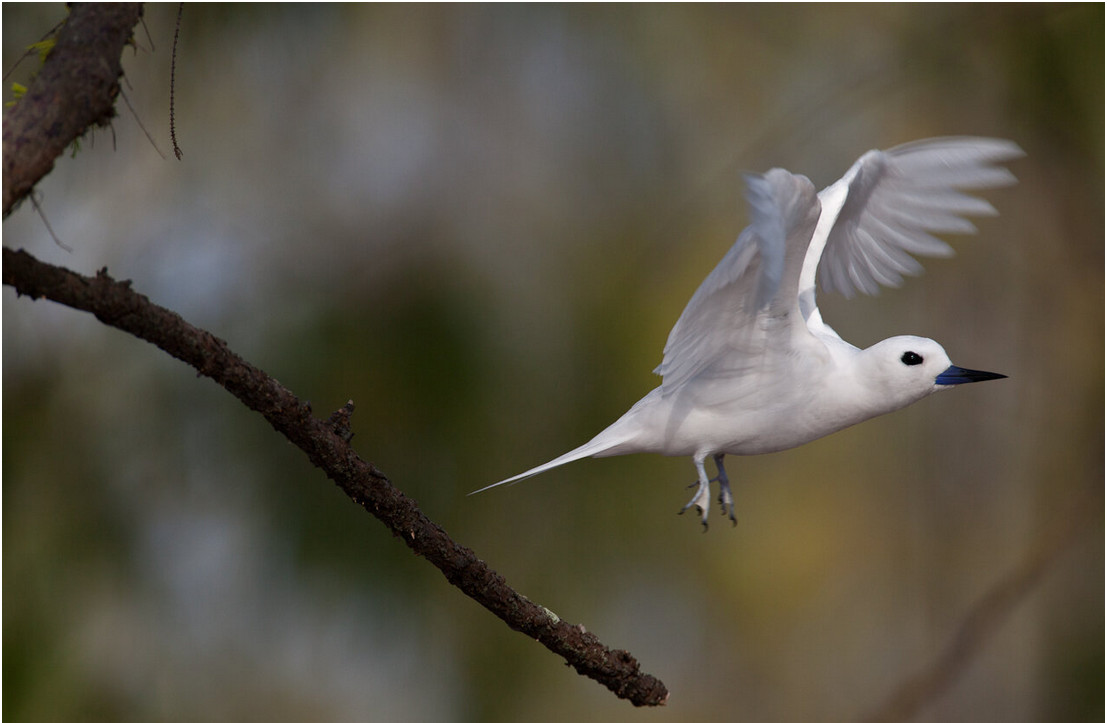
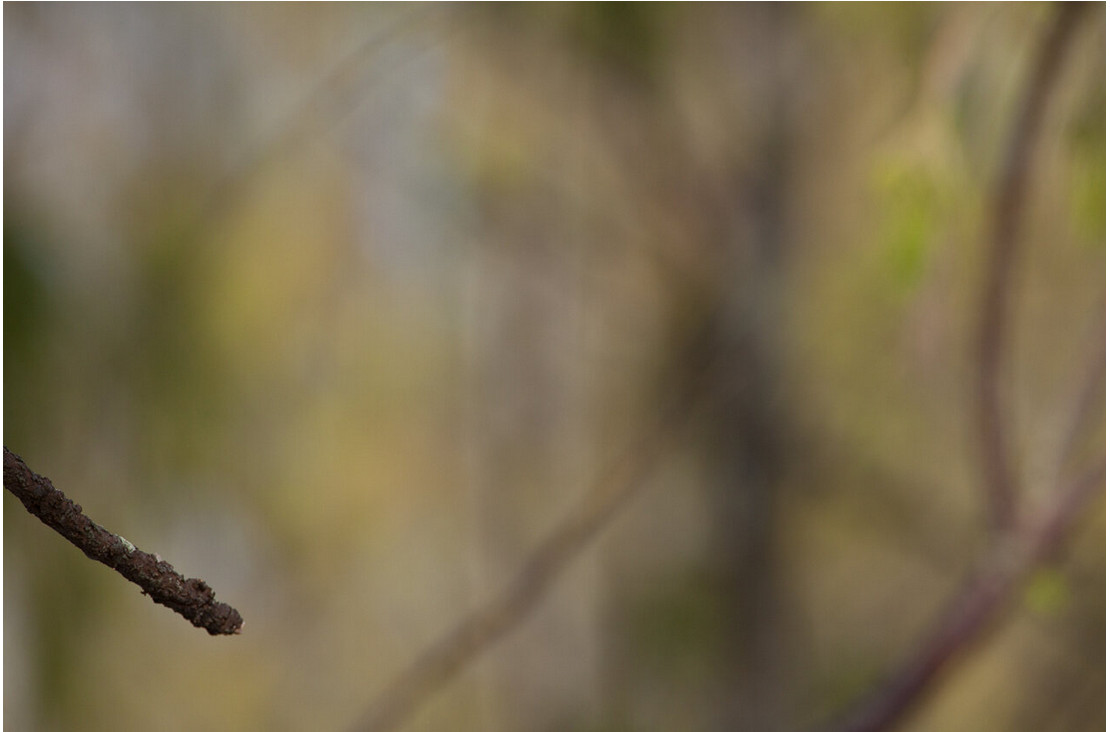
Recognizing that I wanted more background to the right of the first shot, and with the camera and lens combination mounted on a tripod with gimble mount, I swung the lens around a little and got a second shot allowing for a bit of overlap between the two frames.
Figure 2 (Below): (notice the position of the branch in each frame)
Correct focusing
The important thing at the time of taking the second shot was to ensure that the focus didn’t change. Notice in the second shot (as in the first) the end of the branch is in focus but the background (most of the second image) is out of focus. Having used autofocus to initially acquire sharp focus on the bird, it was important not to accidentally engage AF on the second shot. This could have been ensured in a couple of ways. Switching to manual focus and taking the second frame without touching the focusing ring on the lens is an obvious way. In this case, switching focusing methods wasn’t required. One of the things which I’ve done in setting up my cameras is to disengage auto-focusing from the shutter button and only use rear button AF. So simply don’t touch the rear AF button and use the shutter button without fear.
Photoshop Processing
Expanding canvas size
In Photoshop the first step was to open both files, then with the first image, (the one with the bird in it) which from here on I’ll refer to as the “left side image”, I checked the image dimensions. Menu: Image/Size or keyboard Alt+Ctrl+I. The image is 5000 pixels by 3600 pixels, I knew that in order to composite both frames and allowing for the overlap, I would need to create a composite image of roughly 8000×4400 pixels. I next created a new layer and dragged it below the left side image file in the layers stack. By doing this I would be able to position the two image frames on the enlarged canvas and have some flexibility in dragging them around and positioning them. So to create the additional canvas, with the new blank layer selected, Menu: Image/Canvas or keyboard Alt+Ctrl+C to bring up the canvas dialogue box. Enter the new dimension values and select white fill from the canvas dialogue options.
Figure 3, the expanded canvas.
Aligning layers
Next up, bring the “right side” image onto the expanded canvas which we’ve created. Simply click and drag the image over. Then reduce the opacity of the “right side” layer so that you can judge just how far out of alignment it is with the left side image.
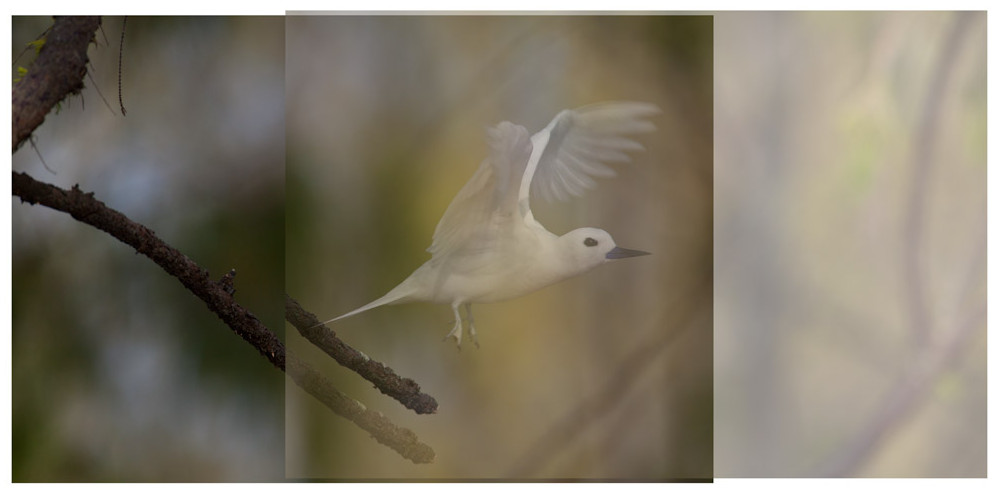
White Tern – Expanded canvas, right side image added to file.
As seen (Figure 3, above), using the branch as a guide, the right side image needs to be moved. Select the move tool Keyboard V and with the right side image layer active, grab and drag till the images line up. To get fine control on this, zoom in and then use the up-down-left-right arrows on your keyboard to nudge the image 1 pixel at a time.
Once you’re happy the images are aligned bring the opacity back up to 100% (Figure 4). As can be seen here the images are not level, but thanks to being taken on the tripod, they don’t require rotating. Had the right side image required rotating then keyboard Ctrl+T for the free transform tool and grab a corner and rotate till it looks right.
Figure 4
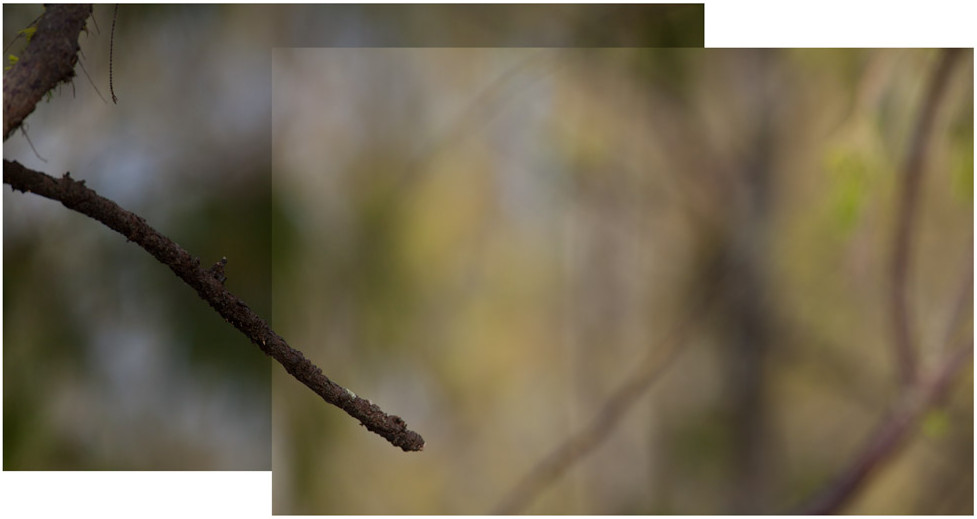
Dealing with stepping in stitched images
As can be seen in the above screen capture, because the two images are not level, when image alignment is done there is “stepping”. How to overcome this? I decided to transform parts of the 2 image layers so as to “fill in” the gaps. A selection was made, with the rectangular marquee selection tool, keyboard M, on the bottom left corner of the “left side” image and it was then placed on its own layer Keyboard: Ctrl+J. That new layer was then transformed, keyboard: Ctrl+T and the selection was dragged out so that it expanded down into the blank space. This “pixel stretching” needs to be done with caution. You are working with a finite piece of information and can only stretch it so far before the image quality goes off noticeably. This procedure was then repeated to the top of the right side image. The result can be seen in Figure 5 (below).
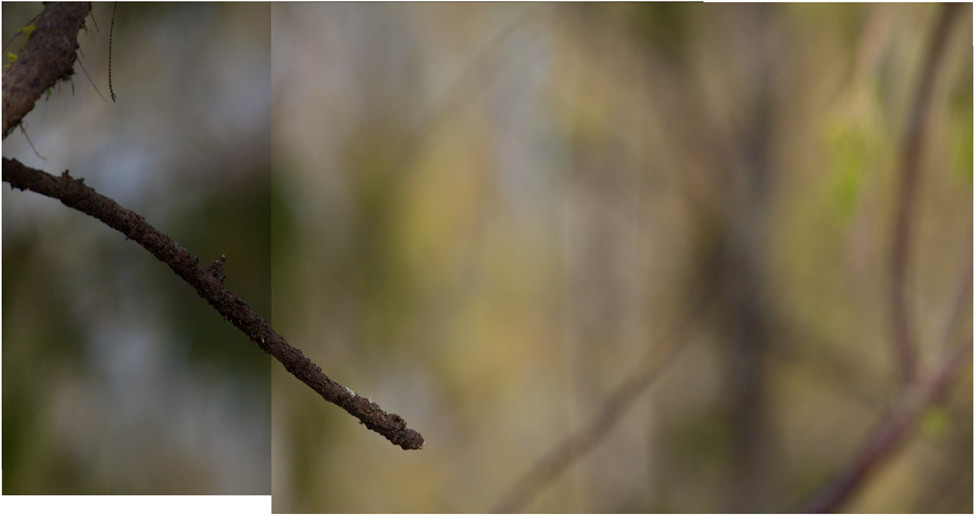
Matching light levels of the layers
As can be seen at the above stage there are differences between the two image layers in terms of lightness and colour balance. In order to correct these differences, I used 2 curves adjustment layers and applied them to the left side image (and the transformed bottom corner)
Figure 6. Curves adjustment layer for lightening.

In order to lighten the left side image, I applied the curves adjustment seen above (Figure 6). A point in the middle of the histogram is pulled up lightening the image till it looks consistent with the right side image.
Adjusting Colour Balance
Figure 7.
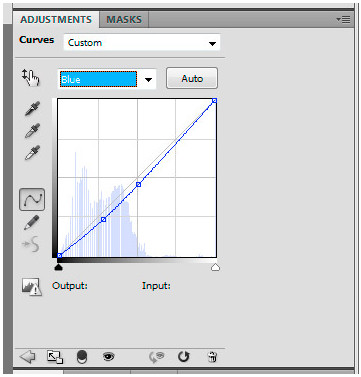
The left side image appears cold in tone, a bit too blue, compared to the right side image. There are a couple of ways to fix this, a colour balance adjustment layer perhaps, but I chose to use a second curves adjustment layer. (Figure 7) In this case, I selected the blue channel and dragged the curve downwards. Blue and yellow being complementary colours, if you reduce blue, you are effectively increasing yellow.
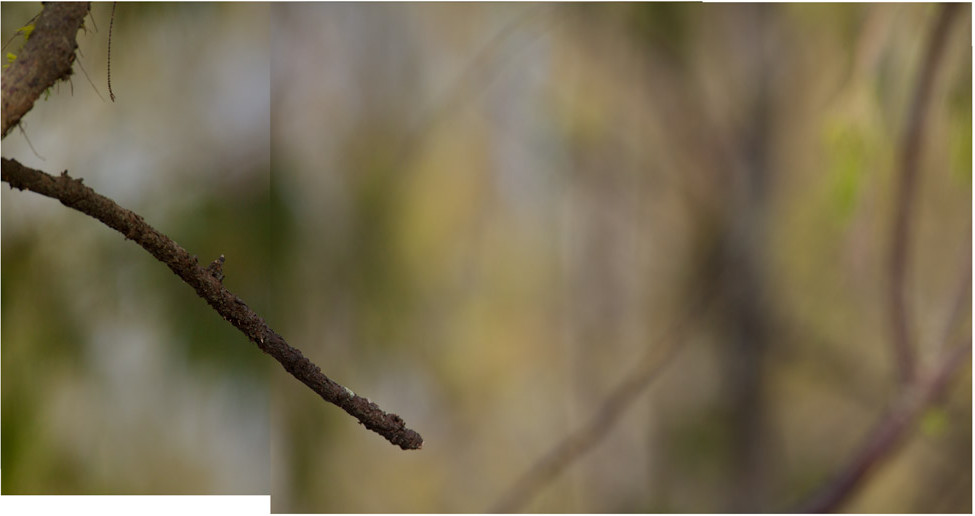 Figure 8. The composite image with curves adjustments.
The composite with the transformations and curves adjustments applied (Figure 8, Above). The bird isn’t visible at this point because the right side image above the left side image in the layers stack. It shall soon be revealed!
Figure 9. The layers stack.
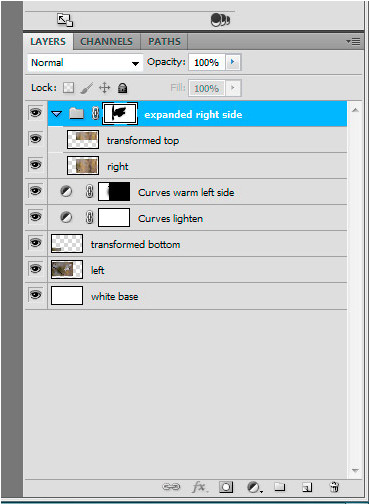 Above (Figure 9) we can be seen the layers stack.
Firstly from the bottom, we see the white base layer which we expanded early on to give us the canvas necessary to fit everything on. Then the left side image, followed by the transformed bottom left corner. The right side image and the transformed top right corner layers are further up.
Between the left side and right side elements are the curves adjustment layers. Their position is important as they only influence the layers below them, not the layers above them.
Masking
In order to reveal the bird (and clean up the edge of the right side image which is visible against the underlying left side image), it’s necessary to do some masking. So that the masking applies to both the right side image and the transformed top right element I grouped those two layers together by highlighting both layers and then Keyboard: Ctrl+G.
By painting on the mask with a soft black brush the underlying image is revealed. Black reveals, white conceals!
note: it’s good practice to name your layers as you go to avoid confusion.
Figure 10. Masking the “right side” to reveal the bird on the underlying layer.
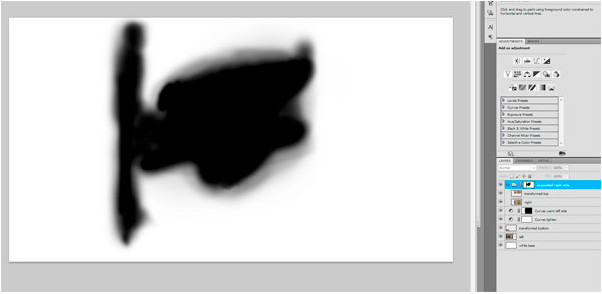
To see the mask on its own, hold down the “Alt” key and click on the mask, it will then be displayed as above. To return to normal viewing hold down the Alt key and click on the mask a second time.
Cropping
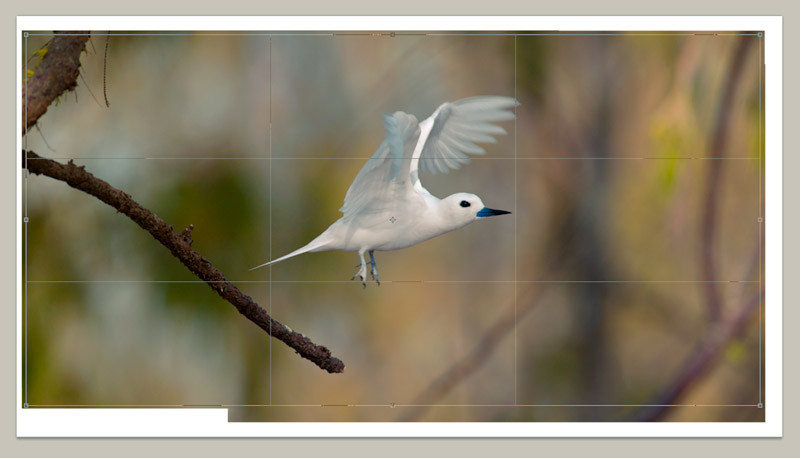 The next step is to crop the image, keyboard C for the crop tool and drag it out to where it looks best. (Figure 11, above) Note: For reasons that aren’t clear to me, the colour values in this example image don’t look right, this isn’t due to the Photoshop procedures explained here but seems to be related to the screen capture procedure. The key here is the cropping! Drag it out as you require and hit the enter key.
Conclusion
So there you have it, the Photoshop processing of the “White Tern taking off” image. I find now that I’m using Lightroom for more and more of my image processing needs, however, where you wish to composite images, Photoshop is still de rigour. Having completed the compositing, I saved it as a layered TIFF file. Back into Lightroom for noise reduction, sharpening and a very subtle vignette. Hopefully, for readers who are new to Photoshop, this has given you a few ideas and techniques that you can employ in your own photographic endeavours.
Photoshop Keyboard Shortcuts and Hints.
One thing which I do recommend to people is that they learn some of the keyboard shortcuts. I, like most users, find that there are probably about a dozen that I use frequently and they are real-time savers rather than continually clicking through menus.
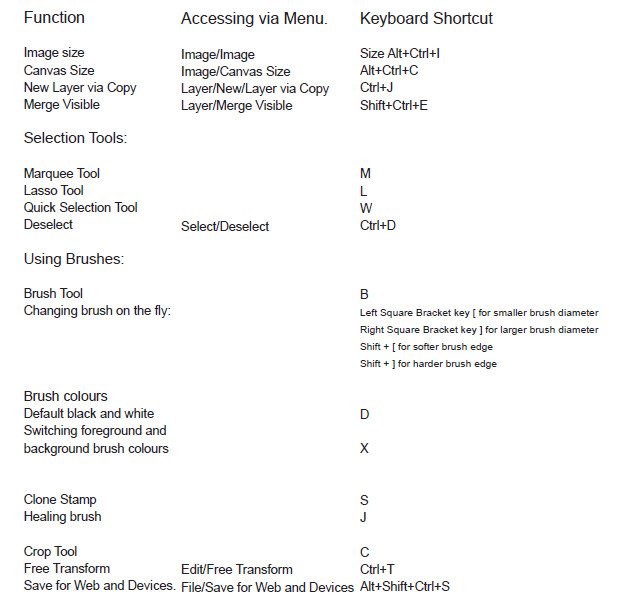
A FREE Download.
Would you like the Photoshop keyboard shortcuts shown above in a simple printable form? Grab the FREE downloadable PDF,
20 useful photoshop shortcuts, print them out and keep them near your computer whilst you work. After a while, they’ll be committed to memory!
If you have found this of value, do consider subscribing to my blog updates! And while you’re at it, let your friends know too! 🙂 ~KD.
→ 2 thoughts on “Image compositing using Photoshop”
Chip “Roket Man” Allen says: 25 April, 2012 at 10:20 am I’m going to have to give this another read when I’m not stoned out of my gourd on pain killers:-) Had a great trip but I’m paying for it now!
KD says: 28 April, 2012 at 8:35 pm given my writing style, I’m concerned that being “stoned…on pain killers” might be the only way it makes sense. I hope not! 😉