An experiment using Google’s Color Efex Pro (formerly Nik Color Efex Pro).
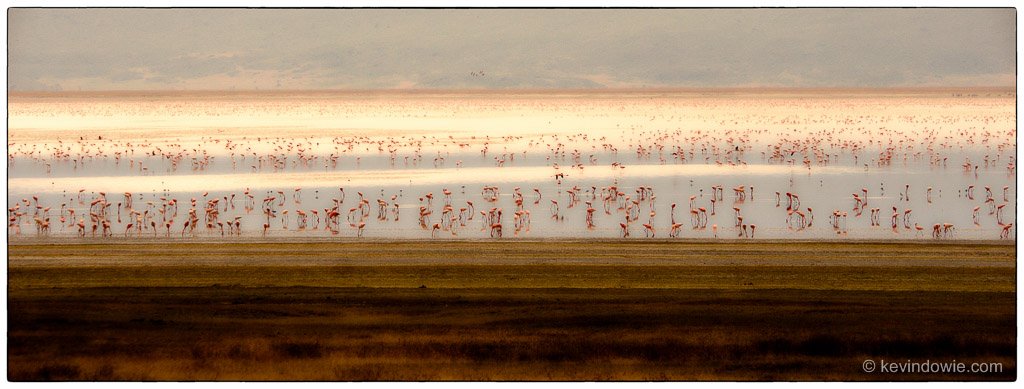
An experiment using Google’s Color Efex Pro (formerly Nik Color Efex Pro). The image is of a flock of lesser flamingos feeding on a lake in Tanzania. Taken from quite a distance away, as it was physically impractical to get any closer, the image lacked pin-sharp detail of the birds. After some basic processing in Lightroom and cropping, I took the image into CFX where, I decided to depart from reality and go for a more impressionistic effect, the lack of detail not being a great issue with this approach.
CFX offers all sorts of options for image processing, the filters I used, in this case, were as follows;
Levels and Curves; to lighten the midtones.
Midnight filter; using the “sepia” colour set and including a blur effect, contrast, brightness and colour saturation adjustments.
Brilliance and Warmth; for further colour saturation enhancement.
Lens Vignette; A subtle corner darkening vignette was added.
Graduated Neutral Density; To darken the upper edge of the image. Again only a subtle adjustment was made.
Image Border; Selected from one of the presets.
Some filters had a more substantial effect than others, at least when used at their default values. The “Midnight” filter had the most obvious effect and was the key to the overall feel of the final image.
If there is one annoyance I find with these plugins, (Color Efex Pro, Silver Efex Pro, etc) it’s that the image border effects impinge the original image frame. That is, the border effect works within the image frame removing edge details. With this in mind, not wanting to lose any of the image itself, I will sometimes take the image into Photoshop and expand the canvas before activating the plugin. It sure would be nice if the plugin could be used in such a way that the border effect worked its way outward, and automatically adjusted the image dimensions, rather than inward and lose image details.
If anyone wants to know more about the image or the methods used, let me know. ~KD