What are the best settings to use when sharpening digital photos in Photoshop?
Introduction.
Recently (June-July, 2008) whilst travelling through Tanzania, I was fortunate enough to get to use, some might say “play with”, Canon’s highly anticipated 800mm F5.6 IS super-telephoto lens. This was a great opportunity to use a rather exotic piece of equipment which I’ll probably never actually own given its fairly specialized application and its hefty price tag.

Following my, all too brief, use of the lens and in view of its limited availability, I published a brief article with images attached explaining my experience and offering an insight to readers. (see previous article Canon 800mm F5.6 super-telephoto lens. My brief encounter!) In preparing the images for that article I deliberately used the absolute minimum digital processing of the RAW files and, of course, for the purposes of internet display, the files were converted to Jpegs in sRGB colour space and downsized. Among my reasons for such minimum treatment of the images, was to give an impression of the raw, inherent, qualities and attributes of the lens without other distracting or distorting influences.
Image quality and the role of digital sharpening.
Interesting and worthwhile images are dependent on numerous factors chief among them being interesting/worthwhile subject matter, lighting, and composition. However, to make the most of these things, we also give some thought to the quality of equipment at our disposal, the techniques of using that equipment, and our processing of the resultant image files. I won’t dwell here on field technique (important as it is) as I’ve already touched on that in the previous article (1/25 second shutter speed anyone! Ouch!). Among the elements of digital post-processing and presentation is the role of digital sharpening. Image quality, and our perception of it, are influenced by such things as colour values and relationships, contrast, and perceived sharpness or acutance. Using Photoshop I’ve prepared a series of examples below. The image chosen is of a dik-dik, the smallest of the antelope species, photographed from a safari vehicle in Tarangire National Park, using the 800mm lens attached to a Canon 20D DSLR, resting on a bean bag for support. The aperture used was F5.6, shutter speed 1/320 second, and ISO 100.
The images.

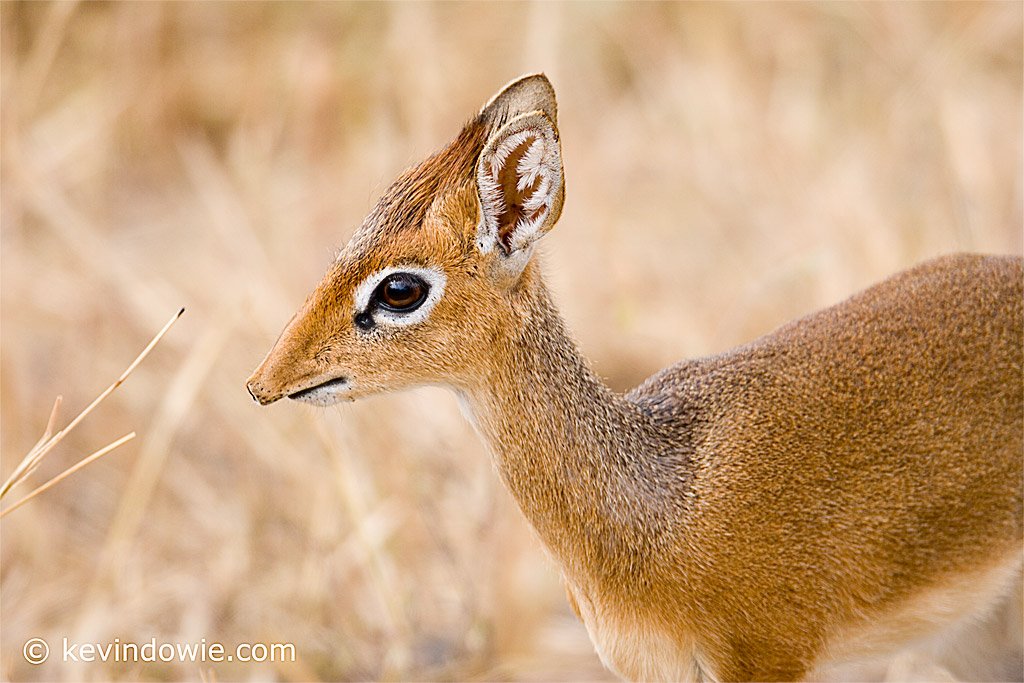
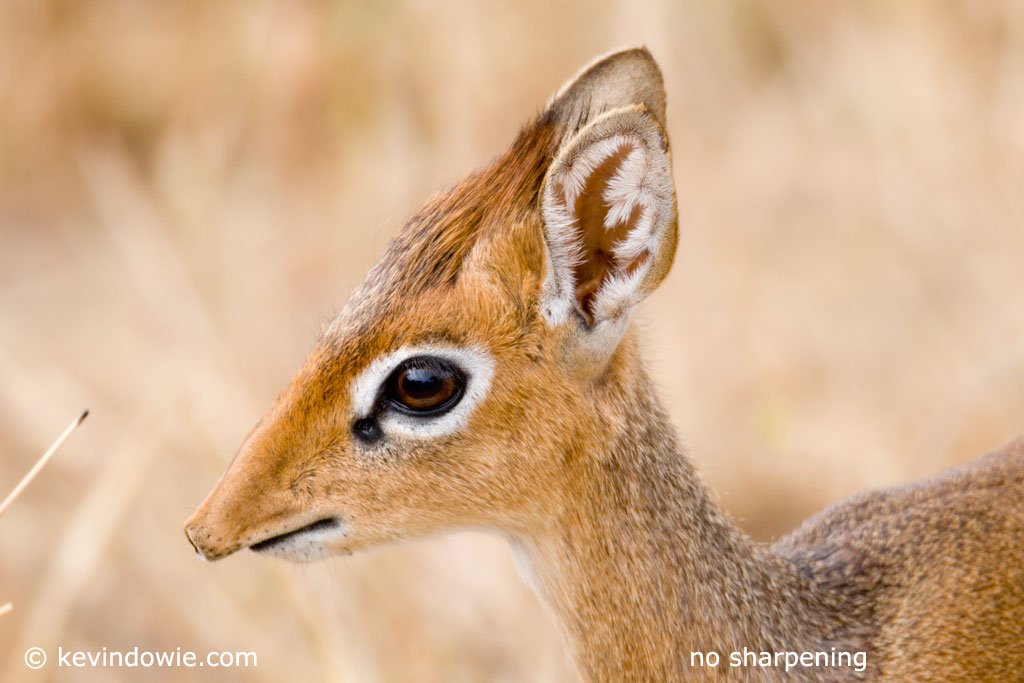

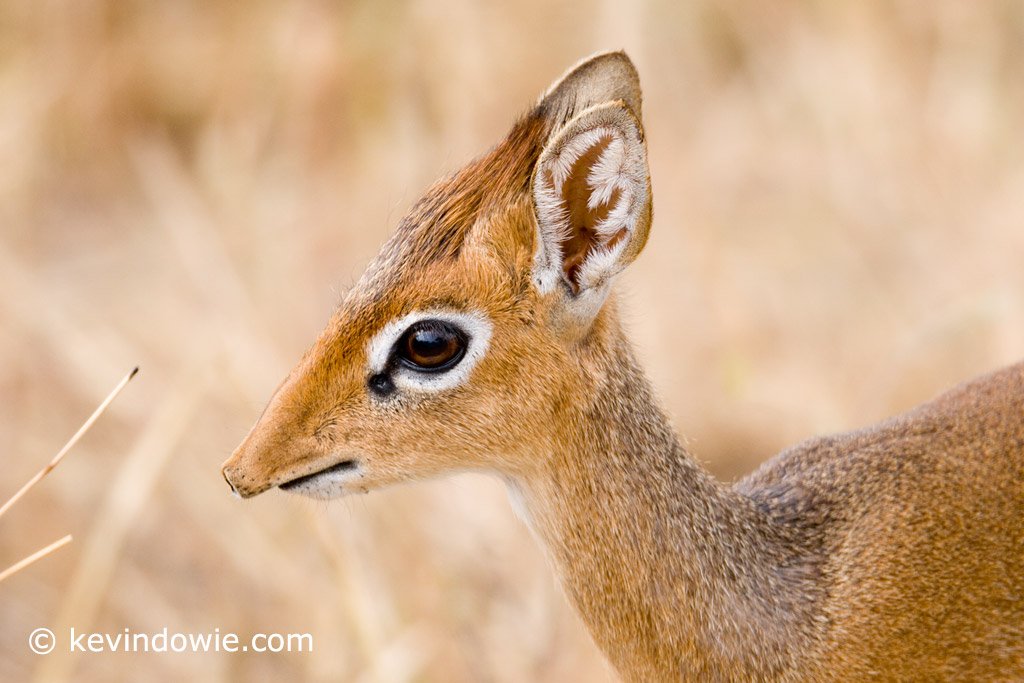

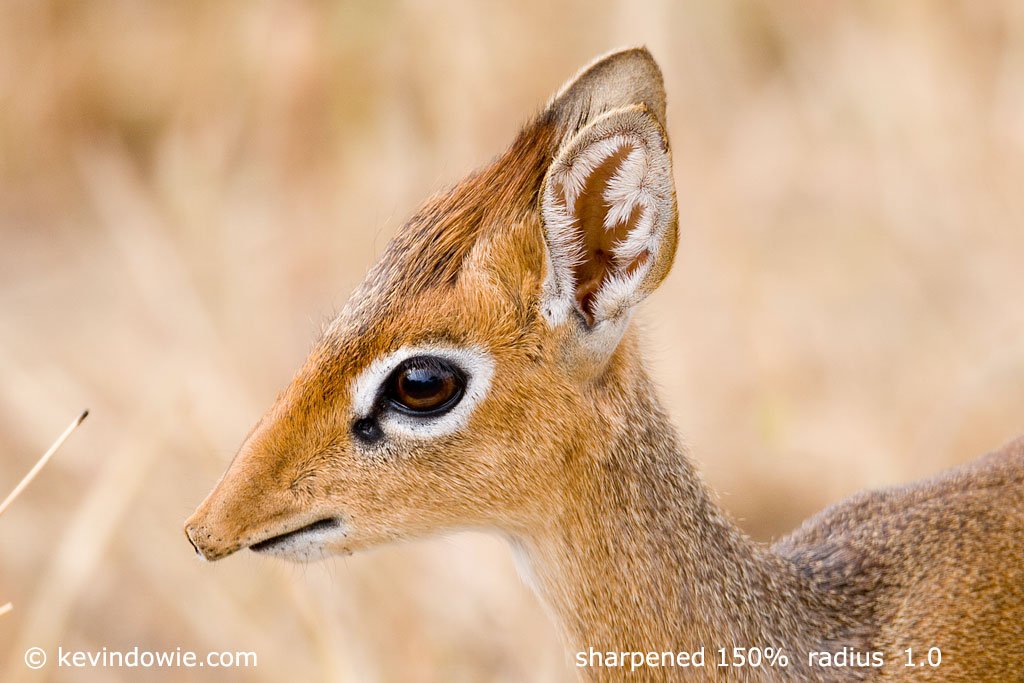


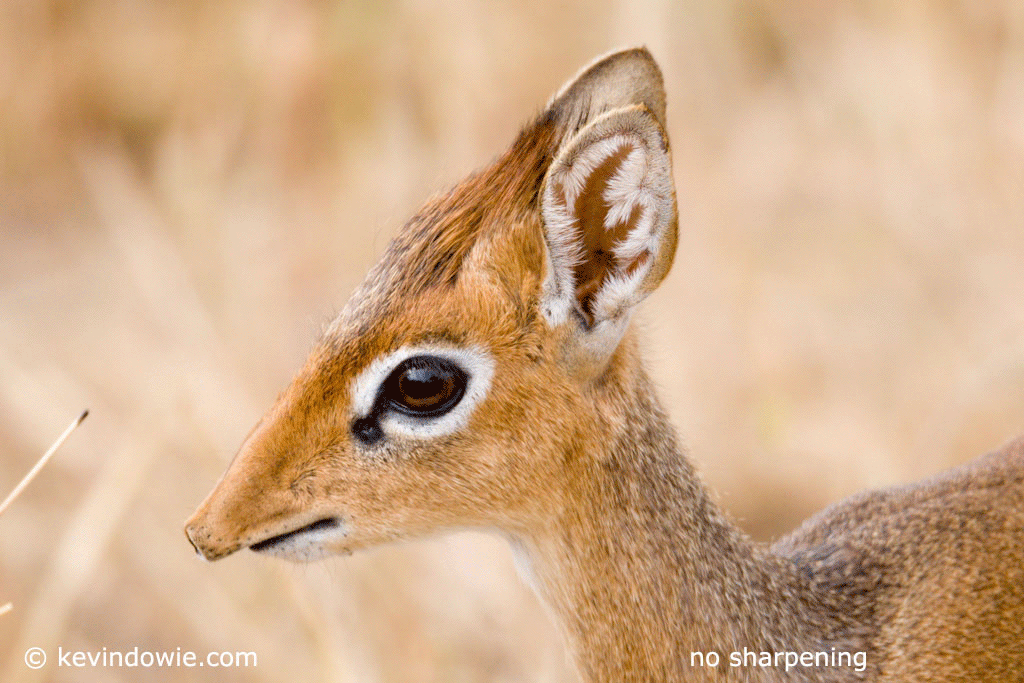
Image preparation and file size.
The RAW file was converted in Adobe Camera Raw with the settings on auto, an increase, in contrast, occurred as a result. I set the resolution to 360 PPI as this is my practice in preparing images for an inkjet printer and bicubic interpolation has occurred in that process. Image dimensions ended up at 5255×3504 pixels or 37×25 centimetres (15×10 inches) for the full-frame image giving a file size, without any adjustments/layers, of 105 megabytes. There are several approaches to digital sharpening, some people would use an unsharp mask, I used PS CS3’s smart sharpen filter as a matter of personal preference.
Conclusions.
This really does become an exercise in pixel peeping and so much depends on personal preference. Also important is the subject matter itself, does the subject contain a lot of fine detail? Also, the magnification of the image is important to the influence of sharpening. In the full-frame image, the difference between no sharpening and the higher level sharpening is fairly subtle at least on my computer monitor. Whereas in the closeup crop the effects of different sharpening levels and radius are more obvious. So how much sharpening is enough? Once again this is a personal choice. In the animated GIF, I’ve presented the extremes of this exercise, with no sharpening compared to 200% at 3.0 pixel radius. Without sharpening, the image, particularly the way the fur of the animal is depicted, is soft. Whereas in the final image the animal’s fur now appears coarse, to my eye its texture is starting to look like a scrubbing brush! As I said, personal preference is key to all this. For me personally, I think back to the subject matter. The African grasslands and scrub and the animals present in those environments are fascinating. There is a balance between predator and prey where only the fittest survive. The tiny dik dik relies on cover and camouflage for its survival, it’s alert, watchful, it has to be. I was struck by how delicate this animal appeared and would be wary of over sharpening the image given my recollection of it.
Kevin Dowie (July, 2008)
Notes. I have no formal or commercial relationship with any of the people, companies nor products referred to in this article and the views expressed here are my own. These views are not vetted by nor endorsed by any company referred to. If anyone has any comments or feedback regards this article, please use my contact page.