The Pipiwai Trail winds its way through Haleakala National Park to Waimoku Falls (see previous blog entry) a fairly easy hike of about 2 hours through different vegetation zones. Starting near sea level at Ohe’o Gulch and making its way through forests of mango and banyan trees, then through a forest of bamboo before getting to the falls. Whilst the falls are impressive with a 400 foot drop, I found that some of my most pleasing photos were along the way through the forests.
The bamboo forests are kind of spooky in a way with the plants often swaying in the breeze and clicking and clacking against each other. The plants chatter amongst themselves. In parts, they form quite a barrier, or screen, with the effect that what’s around the next corner of the path is completely hidden from view. The bamboo is so densely formed that parts of the forest, particularly the forest floor, are really quite dark. The feature image was taken when, for just a moment, the sun angle picked up a small gap in the canopy and allowed a narrow shaft of light to penetrate to the forest floor, it lasted no more than a minute. Unusual light! A single bright light in an otherwise dark place, naturally I was drawn to it like a moth!
Contrast or Detail?
Conventional wisdom, when processing images, is that you want to get a full range of tones with detail in both the shadows and highlights. For most subjects that works well, but in this case, it wasn’t appropriate. I could have bracketed exposures and tried to get that full range of tones via HDR, but that wasn’t the point of the image anyway and would have defeated the purpose. Obviously, the scene was very high contrast and I decided to accentuate that contrast allowing the darkest shadows to go black and the brightest highlights to blow out. I wanted that brightly lit area to glow “ghost-like” in the darkness.

In addition to the bamboo forest, there are other sections of forest with an under-story of ferns. The stepping stones were wet from recent rain.
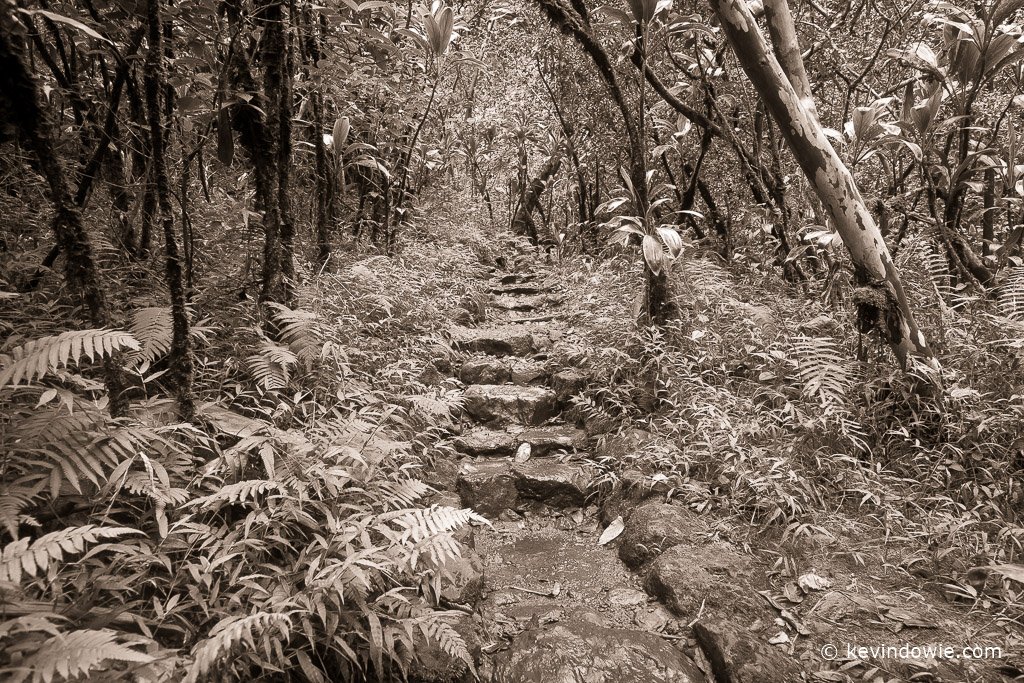
Below; the same view as above but a different choice of format, vertical as opposed to horizontal. There are arguments for each approach, it becomes a matter of personal preference.
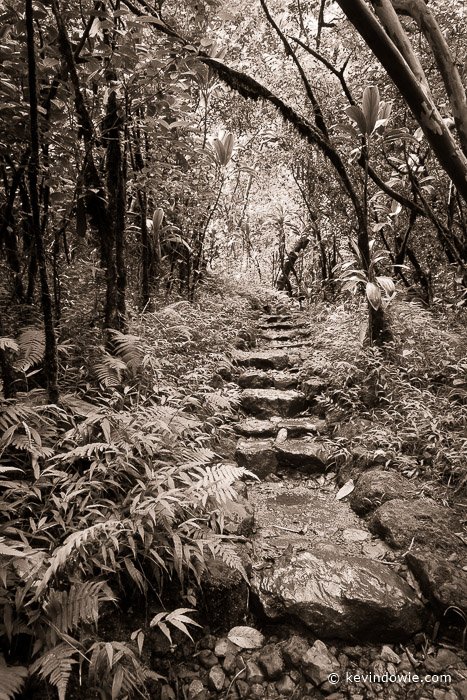
Compositionally, I think the vertical shot works due to the vertical arrangement of the stepping stones which are the main component in the image.
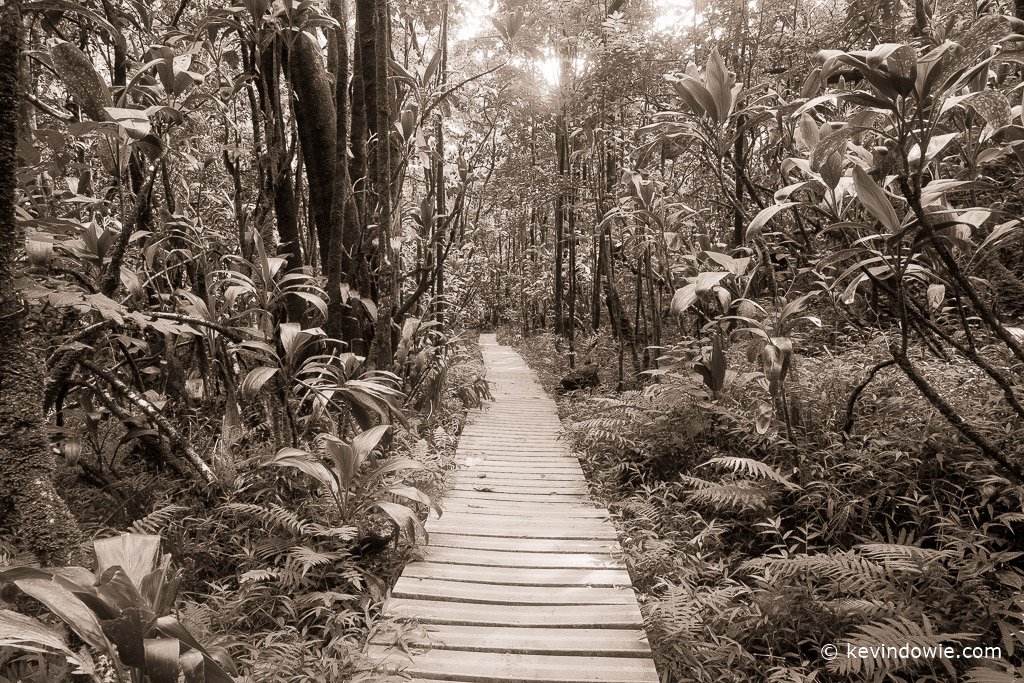
Compositional Elements.
This scene appealed to me because of the obvious graphical elements present. The vertical (well mostly vertical) bamboo and of course the boardwalk.
The boardwalk curving through the frame is a classic compositional element. The curving lines encourage the eye to follow their path into the image. Often such lines can be used to draw the eye to a particular point of interest in the image, but in this case, the boardwalk disappears around a corner, hopefully, it creates a sense of mystery. Where does it go? What’s at the end of the path?

Image Processing using Lightroom.
One or two people have asked about the processing of my recent toned black and white images. All images were processed in Adobe Lightroom 3.5. My first step (with the exception of the feature image for the reasons discussed earlier) is to simply hit the auto process button to see the result and use that as a starting point for further processing. The software makes the calculations for that ”full range of tones” result, in doing so it will apply highlight recovery to try and bring as much highlight detail back as possible in those parts of the image that are overexposed or blown out, and it will apply fill light to try and bring up any blocked up shadows. This is obviously dependant on the original capture and whether the exposure was correct and limited by the exposure latitude of the system and whether it was possible to capture all the tones in the scene anyway.
Another thing that I do in the early stages of processing is to use the lens correction feature. In almost any lens there is some amount of linear distortion, particularly when using wide angles and/or zoom lenses. Lens correction can be used at its profiled setting (which I find works fine) and, as its name suggests, the image will be corrected for any distortion and also vignetting that the lens may have imparted. Having looked at the “corrected” image I will then make a decision as to whether to go with the correction or not. Some images compositionally can actually look better uncorrected.
A conversion to black and white follows. In most of these shots, I simply accepted the default B&W conversion, however, there is the facility to lighten or darken the underlying colours in the image. This can be useful if, for example, you have some sky in the image which you wish to darken. Grab the blue slider within the black and white module and drag it down.
The next step was to use the split toning module. This can be used to impart differing effects to the highlights and shadows however, in this case, I wanted a single tone over the whole image, so the hue was set to 40 points and saturation to 20% for both highlights and shadows. This 40/20-40/20 toning is one I like so much that I’ve now saved it as a develop preset.
Thanks to those who’ve shown their interest in what I’m doing here, as always I welcome any comments, questions or feedback you may have. The best way to get hold of me is via the Contact page. ~KD.