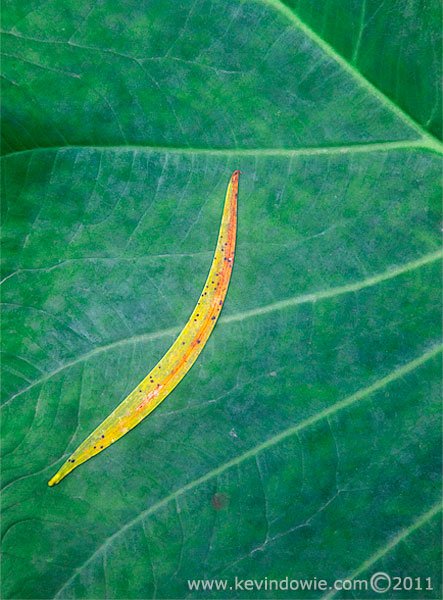
A simple botanical study
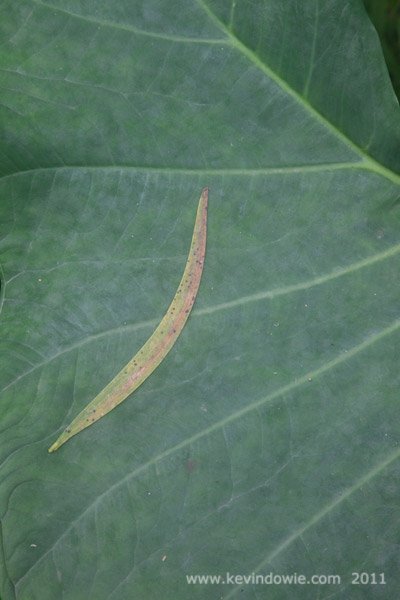
From my Hawaii files, today it’s a fairly simple botanical study, two leaves, one laying on top of another, couldn’t be much simpler than that! However, it did prove to be an interesting exercise in image processing using Photoshop.
Photoshop processing steps
As can be seen, the original was quite insipid, not at all as I visualized it. I was drawn to the scene by the geometric shapes and lines in the leaves and the colour contrast between the two leaves. Processing would be aimed at emphasizing those elements, trying to draw on the warm colours of the smaller leaf and the cooler colours of the background leaf. The steps were as follows;
-
Cropping, I wanted to eliminate the top right corner which I felt was a distraction
-
Cloning/spot removal, there were tiny pieces of dust etc on the leaf which I wanted to remove to give a “cleaner” image
-
Selective colour adjustment to boost the reds, yellows and magentas, whilst reducing the blues. This was confined to the smaller leaf by masking
-
Selective colour adjustment to reduce the reds and yellows, whilst boosting the greens, cyans and blues. This was confined to the background leaf by masking. (The same mask was used as for the previous adjustment layer but inverted)
-
Curves adjustment layer used to increase contrast, once again the same mask was used to confine the effect to the smaller leaf.
-
Dodge and burn layer to lighten the smaller leaf and the top right corner whilst darkening the other three corners
-
Image sizing, text layer and conversion to jpeg for web display.
Conclusion
Did I end up with what I visualized? I’d love to say I knew exactly what I’d end up with at the time of taking the photo, but it’s part pre-visualization in the field and part exploration in the software as well. In the end, I’m happy with the result. ~KD.